

Thursday 2 January 2014
Simple And Stylish "Recent Posts" Text Widget For Blogger
How can add Recent Posts Widget in Bloggers

- Go To Blogger Dashboard
- Go To Layout
- Select Add a Gadget
- Select HTML/Javascript
- Paste the below code into box.
<---Start Recent Posts widget by widgetisim.blogspot.com--->
<script src="http://code.jquery.com/jquery-latest.min.js" type="text/javascript"></script><div id="recent-posts"><script language="JavaScript">
home_page = "http://widgetisim.blogspot.com/";
numposts = 5;
imgr = new Array();showRandomImg = false;boxwidth = 255;cellspacing =
6;borderColor = "#232c35";bgTD = "#000000";thumbwidth = 0;thumbheight
= 0;fntsize = 15;acolor = "#666";aBold = true;icon = " ";text = false;showPostDate
= false;summaryPost = 0;summaryFontsize = 10;summaryColor = "#666";icon2
= " ";</script><script src="http://dl.dropboxusercontent.com/s/niuq8uqagunjvbq/recent-posts-min-1-ycode.js" type="text/javascript"/></script><link rel="stylesheet" type="text/css" href="http://dl.dropboxusercontent.com/s/1wwtykp1mixtr9d/recent-posts-min-2.css" /></div>
<---End Recent Posts widget by widgetisim.blogspot.com--->
 »
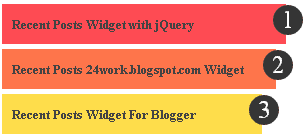
»Recent Posts Widget for Blogger Text CSS Hover Effect with jQuery
How to add different style Recent Post Widget In Blogger.
Live Demo
- Go To Blogger Dashboard
- Go To Layout
- Select Add a Gadget
- Select HTML/Javascript
- Paste the below code into box.
<script src="http://code.jquery.com/jquery-latest.min.js" type="text/javascript"></script><div id="recent-posts"><script language="JavaScript">
home_page = "http://widgetisim.blogspot.com/";
numposts = 5;
imgr = new Array();showRandomImg = false;boxwidth = 255;cellspacing = 6;borderColor = "#232c35";bgTD = "#000000";thumbwidth = 0;thumbheight = 0;fntsize = 15;acolor = "#666";aBold = true;icon = " ";text = false;showPostDate = false;summaryPost = 0;summaryFontsize = 10;summaryColor = "#666";icon2 = " ";</script><script src="http://dl.dropboxusercontent.com/s/niuq8uqagunjvbq/recent-posts-min-1-ycode.js" type="text/javascript"/></script><link rel="stylesheet" type="text/css" href="http://dl.dropboxusercontent.com/s/ecikvgo68yrfgps/recent-posts-min-1.css" /></div>
Instructions:-
Replace http://widgetisim.blogspot.com/ with your Site/Blog URL
Change number 5 of posts you want.
»Saturday 7 December 2013
How can add social Bookmarking Buttons To Images In Your Blogger Posts
People love to share images and the success of Pinterest has served to confirm this point.So in this post I have a tutorial to add social bookmarking icons from AddThis to your images, the icons will only appear when readers hover over the image and they appear with an overlay.
The buttons we are adding to the images are for Twitter, Facebook, Print, Pinterest, Google + and the Add This button which will cover all other services.

Step 1.
- Go to Blogger Dashboard
- Click The Drop Down Menu For Your Blog
- Choose Template
- Then click on Edit Html
Step 2.
Find the following piece of code in your blogs Html : (Click Ctrl and F for a search bar to help find the code -
</head>
Step 3.
Copy and Paste the following code Directly Above / Before </head>
<script src='http://s7.addthis.com/js/300/addthis_widget.js' type='text/javascript'/>
<script type='text/javascript'>
var addthis_config = {
services_overlay:'facebook,twitter,print,pinterest,google_plusone_share,more'
}
</script>
Add Class To Images You Want Bookmarking Buttons On
Now we need to add a tag to images we want the buttons on.
OK if your uploading your images directly onto Blogger we have an easy way to add the class.The code below is how the html for an image looks when uploaded to Blogger.
Important - This is when you upload the image in compose mode.
<div class="separator" style="clear: both; text-align: center;">
<a href="https://blogger.googleusercontent.com/img/b/R29vZ2xl/AVvXsEi6ikOzAIj6LVhMLSww8_Ke9Ripx7vYxqa-ZKGlbcJyqTpOmMyAWImbDLKgyfhWwnYxHTHmMeYckxKgFh_fdVN619qokcO03o2AVFf2-KCnZfTa7nV27UZZmppdLrNkHWwKHRtTAi2TJCoP/s1600/image-effects-image-2.png" imageanchor="1" style="margin-left: 1em; margin-right: 1em;"><img border="0" src="https://blogger.googleusercontent.com/img/b/R29vZ2xl/AVvXsEi6ikOzAIj6LVhMLSww8_Ke9Ripx7vYxqa-ZKGlbcJyqTpOmMyAWImbDLKgyfhWwnYxHTHmMeYckxKgFh_fdVN619qokcO03o2AVFf2-KCnZfTa7nV27UZZmppdLrNkHWwKHRtTAi2TJCoP/s1600/image-effects-image-2.png" /></a></div>
You can see highlighted div class="separator" we change this to div class="addthis_shareable" like below :
<div class="addthis_shareable" style="clear: both; text-align: center;">
<a href="https://blogger.googleusercontent.com/img/b/R29vZ2xl/AVvXsEi6ikOzAIj6LVhMLSww8_Ke9Ripx7vYxqa-ZKGlbcJyqTpOmMyAWImbDLKgyfhWwnYxHTHmMeYckxKgFh_fdVN619qokcO03o2AVFf2-KCnZfTa7nV27UZZmppdLrNkHWwKHRtTAi2TJCoP/s1600/image-effects-image-2.png" imageanchor="1" style="margin-left: 1em; margin-right: 1em;"><img border="0" src="https://blogger.googleusercontent.com/img/b/R29vZ2xl/AVvXsEi6ikOzAIj6LVhMLSww8_Ke9Ripx7vYxqa-ZKGlbcJyqTpOmMyAWImbDLKgyfhWwnYxHTHmMeYckxKgFh_fdVN619qokcO03o2AVFf2-KCnZfTa7nV27UZZmppdLrNkHWwKHRtTAi2TJCoP/s1600/image-effects-image-2.png" /></a></div>
That's it the bookmark buttons will be on images you add this code to.
- If you are adding images in html mode or adding externally hosted images your image code will be like this :
<a href="https://blogger.googleusercontent.com/img/b/R29vZ2xl/AVvXsEi6ikOzAIj6LVhMLSww8_Ke9Ripx7vYxqa-ZKGlbcJyqTpOmMyAWImbDLKgyfhWwnYxHTHmMeYckxKgFh_fdVN619qokcO03o2AVFf2-KCnZfTa7nV27UZZmppdLrNkHWwKHRtTAi2TJCoP/s1600/image-effects-image-2.png"><img src="https://blogger.googleusercontent.com/img/b/R29vZ2xl/AVvXsEi6ikOzAIj6LVhMLSww8_Ke9Ripx7vYxqa-ZKGlbcJyqTpOmMyAWImbDLKgyfhWwnYxHTHmMeYckxKgFh_fdVN619qokcO03o2AVFf2-KCnZfTa7nV27UZZmppdLrNkHWwKHRtTAi2TJCoP/s1600/image-effects-image-2.png" /></a>
We add the class as shown below :
<a href="https://blogger.googleusercontent.com/img/b/R29vZ2xl/AVvXsEi6ikOzAIj6LVhMLSww8_Ke9Ripx7vYxqa-ZKGlbcJyqTpOmMyAWImbDLKgyfhWwnYxHTHmMeYckxKgFh_fdVN619qokcO03o2AVFf2-KCnZfTa7nV27UZZmppdLrNkHWwKHRtTAi2TJCoP/s1600/image-effects-image-2.png"><img class="addthis_shareable" src="https://blogger.googleusercontent.com/img/b/R29vZ2xl/AVvXsEi6ikOzAIj6LVhMLSww8_Ke9Ripx7vYxqa-ZKGlbcJyqTpOmMyAWImbDLKgyfhWwnYxHTHmMeYckxKgFh_fdVN619qokcO03o2AVFf2-KCnZfTa7nV27UZZmppdLrNkHWwKHRtTAi2TJCoP/s1600/image-effects-image-2.png" /></a>
You are done...
»Random Post Widget for Bloggers
Today I am sharing a blogger widget for you. This post is about posts, Random posts. You can past this code in any place of your post area or your blog. You can past it below post titles, top of post area or any other place. When you click on this button your post show one by one.

Live Demo
- Go to Blogger Dashboard
- Go to Layout
- Add a Javascript / HTML
- Paste the below code in it
#abt-random{position:relative;color:rgba(255,255,255,1);text-decoration:none;background-color:rgba(219,87,5,1);font-family:'Yanone Kaffeesatz';font-weight:700;font-size:20px;display:block;-webkit-border-radius:8px;-moz-border-radius:8px;border-radius:8px;-webkit-box-shadow:0 9px 0 rgba(219,31,5,1), 0 9px 25px rgba(0,0,0,.7);-moz-box-shadow:0 9px 0 rgba(219,31,5,1), 0 9px 25px rgba(0,0,0,.7);box-shadow:0 9px 0 rgba(219,31,5,1), 0 9px 25px rgba(0,0,0,.7);margin-bottom:10px;margin-top:10px;width:160px;text-align:center;-webkit-transition:all .1s ease;-moz-transition:all .1s ease;-ms-transition:all .1s ease;-o-transition:all .1s ease;transition:all .1s ease;padding:4px}
#abt-random:active{-webkit-box-shadow:0 3px 0 rgba(219,31,5,1), 0 3px 6px rgba(0,0,0,.9);-moz-box-shadow:0 3px 0 rgba(219,31,5,1), 0 3px 6px rgba(0,0,0,.9);box-shadow:0 3px 0 rgba(219,31,5,1), 0 3px 6px rgba(0,0,0,.9);position:relative;top:6px}
#abt-random a{color: #fff;}
</style>
<center><div id="abt-random"></div></center>
<script type="text/javascript">
function showLucky(root){ var feed = root.feed; var entries = feed.entry || []; var entry = feed.entry[0]; for (var j = 0; j < entry.link.length; ++j){if (entry.link[j].rel == 'alternate'){window.location = entry.link[j].href;}}} function fetchLuck(luck){ script = document.createElement('script'); script.src = '/feeds/posts/summary?start-index='+luck+'&max-results=1&alt=json-in-script&callback=showLucky'; script.type = 'text/javascript'; document.getElementsByTagName('head')[0].appendChild(script); } function feelingLucky(root){ var feed = root.feed; var total = parseInt(feed.openSearch$totalResults.$t,10); var luckyNumber = Math.floor(Math.random()*total);luckyNumber++; a = document.createElement('a'); a.href = '#random'; a.rel = luckyNumber; a.onclick = function(){fetchLuck(this.rel);}; a.innerHTML = 'Random Post'; document.getElementById('abt-random').appendChild(a); } </script><script src="/feeds/posts/summary?max-results=0&alt=json-in-script&callback=feelingLucky">
</script>
- You are Done...
»Friday 8 November 2013
Floating Social Sharing Bar for Blogger

I think you all will liked the widget by seeing the demo. This widget design is actually made by Paul Crowe of Spice Up Your Blog; but he only knows the code for making that. My friend had made the code myself like that. For share buttons, he had used the AddThis buttons. Actually, he had customized the AddThis floating buttons like that of spice up your blog.
Add Widget to Blogger:-
- Go to your dash board...
- Go to Layout...
- Add a widget...
- Select HTML/Javascript...
<!-- HTH AddThis Floating Button BEGIN --><div class="addthis_toolbox addthis_floating_style addthis_counter_style" style="position: fixed; left: 65px; top: 400px; background:#fff; border:0px solid #ddd;"><center><img src="https://blogger.googleusercontent.com/img/b/R29vZ2xl/AVvXsEjCx1IvXD641ffanz1uQ6-gacMQsKarxBFc7u9QTuwqk49eKf_MZgKrtCkWP5L9Dx31l54KBtrk49n2Y-Ja6WNP-qFw3TD8tpnrmDjP1Edtrw0fpfn3HsGEcS8bLk_fyzS1LIVSaVU-6Uo/s1600/12.png" /></center><a class="addthis_button_facebook_like" fb:like:layout="box_count"></a><a class="addthis_button_tweet" tw:count="vertical"></a><a class="addthis_button_google_plusone" g:plusone:size="tall"></a><br /><a class="addthis_counter"></a><br /><a href="http://feeds.feedburner.com/saqisoft" rel="nofollow" target="_blank" title="Subscribe To Our Rss Feed"><img src="https://blogger.googleusercontent.com/img/b/R29vZ2xl/AVvXsEg6-d9ifOTVeaC4_gJrSgInlC6UwQADk1R4qcbjMRpc0pRCzWPcMDAPBNIN95aMSP9arEBIQf0ozvj_cm1URM9hVh2dBPJ3J-1ED44pSToEyicbK4Ebf5KHZ85PoWC5Zz4pFARzYs9knDU/s1600/rss-updates.png" /></a><a href="http://feedburner.google.com/fb/a/mailverify?uri=saqisoft&loc=en_US" rel="nofollow" target="_blank" title="Subscribe To Our Rss Feed"><img align='left' src="https://blogger.googleusercontent.com/img/b/R29vZ2xl/AVvXsEjqoKrEdPrQo20GTSRy4OMgrgUwYZCvIANg6ZxEFRg7LINEPq5qmpAEf7ix17D8w_F8v1OD8-27D9wgUj7qsd4yNGlq1j9IfZrOH7WyUiCSIpTSJSHgYGE9KicMjtW-dvIxNn2YdI8q2MI/s1600/email-updates.png" /></a><br /><br /><br /><p style=' line-height:0px; font-size:10px; font-weight:bold; text-align:center;'><a href='http://www.saqisoft.blogspot.com/2013/02/add-floating-share-bar-to-blogger-blog.html' target='blank' style='color:#CAC8C8;'></a></p></div> <script src='http://s7.addthis.com/js/300/addthis_widget.js' type='text/javascript'/></script><!-- HTH AddThis Floating Button ENDS -->
You Are Done...
»

Subscribe to:
Posts (Atom)
